 By Owen Palmer
Updated November 2026
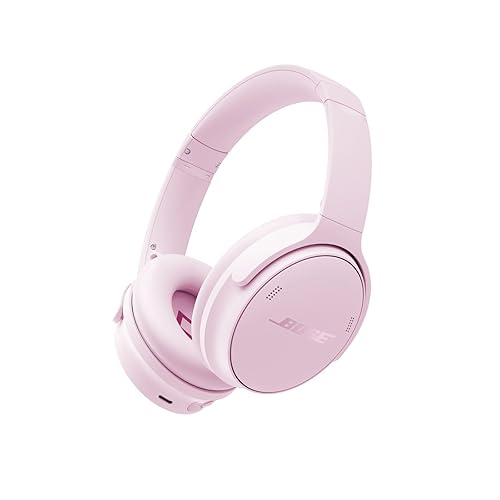
Replacement earpads for Bose headphones are one of the simplest ways to restore comfort and seal when the original cushions start to flatten, crack, or peel. In this guide, you will learn how to confirm which pad style your model uses, pick a compatible replacement, remove the old pads without damaging the ear cup, and install the new set so it sits flush and seals properly. The whole process usually takes about 15 to 30 minutes with basic tools.
Why Bose Earpads Wear Out
Most Bose over-ear headphones use a foam core wrapped in a protein leather or fabric covering. Over time, body oils, heat, and repeated compression break down the foam. Owners often report that the leather surface cracks first, followed by the foam crumbling into a fine dust that can leave a residue on your hair or glasses. Once the foam loses its shape, the pad no longer seals against your head, which causes a drop in bass response and a noticeable loss of noise cancelling effectiveness.
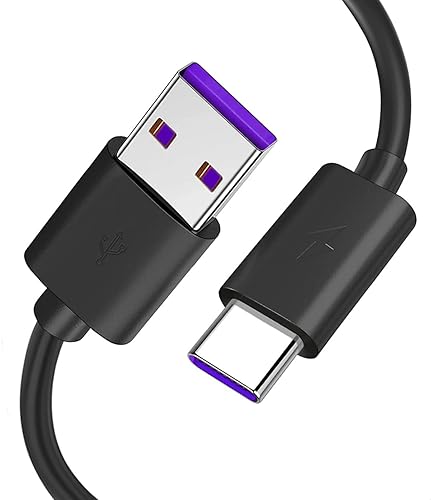
Shopping for one? See our guide: 8 Best Chargers for Bose Headphones: Compatible Replacement Cables Compared.
Replacing the pads is usually cheaper than replacing the headphones, and it can make an older pair feel new again. It also helps if you want to switch between a leatherette and a softer fabric for different climates or comfort preferences.
Step 1: Identify Your Headphone Model and Pad Type
Before you order anything, confirm the exact model name printed inside the headband or on the back of the ear cups. Bose has used several pad designs across its over-ear lines, and the shape, size, and attachment method can differ even between models that look similar. The site’s model guides, such as Replace Cushions Bose Headphones: 6 Best Ear Pads Compared (2026), list the pad styles that match each generation.
Check these details:
- Pad diameter: Measure the outer edge of the old pad. Most over-ear pads fall in a range that varies by model, so compare your measurement against the manufacturer specs rather than guessing.
- Attachment method: Look for clips, slots, or adhesive. Some pads snap onto plastic tabs, while others are glued directly to the cup.
- Material: Leatherette, fabric, or a hybrid. Note whether the original has a smooth or textured surface.
- Shape: Round versus oval. Some models have an asymmetric shape that makes left and right pads non-interchangeable.
Step 2: Choose the Right Replacement Pads
When shopping, match the model name exactly. Generic “fits many Bose models” listings can work, but they are more likely to shift on the cup or leave a gap at the top. Read the compatibility notes closely and look for a clear list of supported models. If the listing mentions a specific generation, such as a particular QuietComfort series, that is a stronger signal than a broad brand name.
You should also consider the material trade-offs:
| Pad Material | Strengths | Trade-offs |
|---|---|---|
| Protein leather | Good seal, easy to wipe clean, closest to original feel | Can get warm in summer, may crack over several years |
| Fabric or knit | Breathable, softer against skin | Less effective at blocking outside sound, harder to clean |
| Hybrid (leather with memory foam) | Balanced seal and comfort | Often more expensive to source, fit can vary by brand |
If you want a sound profile close to the original, leatherette with a firm foam core usually comes closest. If heat is your main complaint, a fabric option may be more comfortable, though you may notice a small change in isolation.
Step 3: Gather Tools and Prepare Your Workspace
Most pad replacements require no special tools, but a few supplies make the job cleaner and reduce the risk of damaging plastic clips.
- A soft, lint-free cloth
- A plastic pry tool or thin guitar pick (avoid metal tools that can scratch the ear cup)
- Isopropyl alcohol, if the pads are glued and you need to clean the residue
- A flat, clean work surface with good lighting
- The replacement pads, plus any adhesive included in the kit
Keep the headphones powered off and unplugged during the process so you do not accidentally press buttons or trigger the battery connection.
Step 4: Remove the Old Earpads
For clip-on pads
Grip the edge of the pad at the top and gently pull outward. Work slowly around the perimeter, releasing one clip at a time. If the pad resists, slide your plastic tool under the edge and lift gently. Forcing it can crack the cup housing.
For adhesive pads
Peel the pad slowly from one edge. If the adhesive is stubborn, warm the area lightly with a hair dryer on a low setting for about 20 to 30 seconds to soften the glue. Then remove leftover residue with a cloth dampened in isopropyl alcohol, and let it dry fully before installing anything new.
Step 5: Install the New Earpads
Align the new pad with the cup before pressing it in place. Check the orientation, especially on pads with a directional shape. For clip-on designs, start with the top clips, then press the lower edge until each one clicks. For adhesive designs, peel the backing from one side at a time and press from the center outward to avoid trapping air bubbles.
Once installed, press firmly around the full edge for about 30 seconds so the bond sets. Then wait at least a few hours before putting the headphones on, especially with adhesive versions.
Step 6: Test the Fit and Seal
Put the headphones on and check for these points:
- The pad sits evenly all the way around your ear with no gaps at the top or back.
- The headband pressure feels similar to before the swap.
- Bass response sounds full when you play a track with a steady low-frequency line. A loss of bass usually points to a poor seal.
- Noise cancelling engages normally, with no sudden hiss or rumble from a poor seal.
If the seal feels weak, remove the pad and reseat it, checking that no clip is misaligned.
Common Mistakes to Avoid
- Ordering by product line instead of exact model: Confirm the model number first, since close generations may use different pad sizes.
- Using too much force: Cracked plastic tabs are one of the most common reasons a headphone cup has to be repaired.
- Skipping the residue cleanup: Leftover adhesive can prevent the new pad from sitting flat.
- Installing pads on a dirty cup: Dust and oil reduce adhesion and can cause peeling within weeks.
- Mixing up left and right: Some pads are shaped differently and only fit correctly one way.
For related setup questions after the swap, such as pairing or charging, see Bose Bluetooth Headphones Connect: A Step-by-Step Guide for Beginners. If you are considering a larger upgrade overall, Bose QuietComfort Headphones vs Ultra: Which One Fits Your Needs? compares the features side by side.
Recommended gear
- Plastic pry tool kit: A set of nylon pry tools lets you lift clips without scratching the ear cup or cracking the housing. View on Amazon
- Isopropyl alcohol, 70%: Useful for removing adhesive residue and cleaning the cup surface before the new pad goes on. View on Amazon
- Lint-free microfiber cloths: Gentle on leatherette and fabric surfaces, and good for wiping dust off the cup before installation. View on Amazon
Tips for a Better Result
- Keep your old pads until you are sure the new set fits. They can serve as a reference for the original shape.
- Replace pads in pairs, even if only one side looks worn. Foam tends to compress unevenly, so matching sides usually sound and feel more consistent.
- Store spare pads in a sealed bag away from heat to keep adhesives working and leatherette from drying out.
- If your headphones use a battery, keep the power off during the swap to avoid pressing any controls by accident.
FAQ
How long do replacement earpads for Bose headphones usually last?
Lifespan depends on use, climate, and skin oil. Many owners report noticeable wear after a few years of regular daily use, with leatherette cracking first. Keeping the pads clean and out of direct sun can extend their life.
Can I use third-party pads on any Bose headphones?
Often yes, but only if the pads are listed for your exact model. Pad diameter and clip design vary across generations, so a close match is not always a correct fit.
Will new pads change the sound?
They can. A better seal often improves bass, while a softer fabric pad may slightly reduce the amount of outside noise blocked. Small differences in foam density can also shift the tonal balance a little.
Do I need to remove the ear cups to replace the pads?
No. In most cases the pads detach directly from the cup. Avoid prying the cup apart, since that can damage internal connections.
What if the new pad does not click into place?
Check that the pad is oriented correctly and that the clips are not bent. If the pad still does not seat, the model may not match. Contact the seller or manufacturer for guidance rather than forcing it.
Is adhesive or clip-on better?
Clip-on pads are easier to change later and reduce the risk of residue damage. Adhesive pads can feel more secure once bonded, but they are harder to remove without leftover glue.
Can I clean the pads instead of replacing them?
Light cleaning with a damp cloth can remove surface dirt on leatherette. Foam that has crumbled or cracked cannot be restored by cleaning, so replacement is the better option in that case.
Should I consult a professional for the repair?
For a simple pad swap, most owners can handle it at home. If the cup is cracked, a wire is loose, or the headphones are under warranty, contact Bose support or a qualified repair service before attempting further work.
Conclusion
Replacing the earpads on your Bose headphones is a practical way to restore comfort, seal, and sound quality without buying a new pair. Confirm your exact model, choose a pad style that suits your comfort needs, and remove the old pads gently to protect the cup. Test the fit afterward, and the headphones should feel close to their original performance.
Related reading
- Bose Headphones Earbud Replacement: How to Get a Single Earbud Replaced
- Sony Versus Bose Noise Cancelling Headphones: Which Fits You Best (2026)
- Replace Cushions Bose Headphones: 6 Best Ear Pads Compared (2026)
- Headphones Bose Black Friday: How to Spot Real Deals on Bose Headphones
- Bose vs Apple Headphones (2026): Which Is Better for Your Daily Use?
- Bose or Beats Headphones (2026): Which Is Better for Your Listening Style?
Ready to choose one?
About Owen Palmer
Owen Palmer is part of our editorial team and reviews and edits our brand headphones & noise cancelling guides, checking product details against manufacturer specifications and owner feedback.